In this episode of my LibreOffice Calc & Python Programming tutorial series I am going to talk about the different types of data stored in a LibreOffice cell, and what type to use in the Python code to keep the same data type than in LibreOffice.
A cell within a LibreOffice Table has no predefined type. Its type comes from its content and can only be one of the 4 following types:
- empty
- value
- string
- formula
These types names are quite self-explanatory:
- empty is simply the type of an empty LibreOffice Calc cell.
- value is the type of any numerical content of a LibreOffice Calc cell.
- string is the type of any text content of a LibreOffice Calc cell.
- formula is the type of any LibreOffice Calc cell that contain a formula.
Note:
Dates, currencies, decimals, booleans within LibreOffice are not types but different formats of numbers. We’ll see how to manage them in a later post.
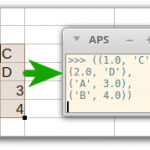
A good way to illustrate the 4 different cell types is to play with them with a simple python code that will display in the console the type of cell selected in LibreOffice Calc.
Please refer to my previous tutorials for creating a program and using the APSO console.
First you need to define the variables provided by XSCRIPTCONTEXT. This XSCRIPTCONTEXT is a UNO object that gather all you need to manipulate LibreOffice Documents with Python scripts.
You can either define these variables at the global level of your program or like I like to do, in a separate function that I call context() to make it more customizable in later programs.
def context():

    # set global variables for context

    global desktop
    global model
    global active_sheet

    # get the doc from the scripting context
    # which is made available to all scripts
    desktop = XSCRIPTCONTEXT.getDesktop()
    model = desktop.getCurrentComponent()

    # access the active sheet
    active_sheet = model.CurrentController.ActiveSheet
In this ‘context()’ method, we first declare the 3 useful variables that will hold our objects as Global Variables. This will allow us to access these objects from other functions, like out main() function. These objects were briefly explained in part 2 of these series of tutorials.
Next we can create our main function:
- call (execute) function context
- get the selected range
- get coordinates of the selected cell
- get the Type of the selected cell
- print in the console and in a cell (optional)
But first, to make testing easier I advise to bind our main() function to a combination of keys on your keyboard. Check out my Annex1 to learn how to do it quickly.
Call context
This is the easiest part, simply:
    # call function context()
    context()
Get the selected range
To do that we use the method getCurrentSelection() of the object ‘model’ that we defined in the context() method further up.
That object ‘model’ is an interface for the ‘Desktop’ environment that we defined in context().
For now we should focus on the end point, the cells themselves. I will write a tutorial to explain how about the Desktop, Interface, Frames and other types of components imported from the UNO library that pyUno is based on.
Once we have an object that contains the selection, we can use the method getRangeAddress() to get useful attribues of this object that we will need to access the value of the cell we want and then the type of that value:
    # get the range of addresses from selection
    oSelection = model.getCurrentSelection()
    oArea = oSelection.getRangeAddress()
Get the coordinates of the selected cell
The object ‘oArea’ is a range of Cell Addresses and has 5 attributes:
- Sheet: the sheet number in the collection of sheets in the Calc document, starting at 0 for the first sheet.
- StartColumn: the index of the first column of the range of cells, starting at 0.
- StartRow: the index of the first Row of the range of cells, starting at 0.
- EndColumn: the index of the last column of the range of cells.
- EndRow: the index of the last row of the range of cells.
In our case we are only interested in the first cell of the selection. Whether we have selected one cell or more we are only going to use the attributes StartColumn and StartRow. Using these 2 values will then let us access the cell using the getCellByPosition() method:
    # get the first cell
    firstRow = oArea.StartRow
    firstCol = oArea.StartColumn
    selectedCell = active_sheet.getCellByPosition(firstCol,firstRow)
Get the Type of the selected cell
Now we have in hand the cell we want, we can check its attribute Type directly with selectedCell.Type.
However this would give us a detailed description of that attribute, a bit too detailed like that:
<Enum instance com.sun.star.table.CellContentType(‘TEXT’)>
This tells us that the attribute Type is in fact a python object of type Enum.
And to get the value of an object of type Enum we simply need to add .value like this:
selectedCell.Type.value
So our code for this part is:
    # get the type of the cell
    cellType = selectedCell.Type.value
Print in the console and in a cell (optional)
To get the console I strongly advice to use the APSO add-on which is so good, so free and just essential to make your life easier wen using Python scripts with LibreOffice, check part 4 of these LibreOffice/Python tutorials to get APSO and to install it. Then you can use the Python print() function to display the type of our cell in the Console.
When working on a Python scrip sometime it’s easier to display directly in a cell, just use the the method getCellByPosition() to set the value of a wanted cell, for example the next cell on the same row as our selected cell.
Note that we don’t need to convert cellType to a string because the value of the Enum Type is a string.
    # print in console
    print("Cell (",firstCol,",",firstRow,") Type:", cellType)

    # display in next cell
    active_sheet.getCellByPosition(firstCol+1,firstRow).String = "Cell Type:" + cellType
Full script for main()
def main():

    # call function context()
    context()

    # get the range of addresses from selection
    oSelection = model.getCurrentSelection()
    oArea = oSelection.getRangeAddress()

    # get the first cell
    firstRow = oArea.StartRow
    firstCol = oArea.StartColumn
    selectedCell = active_sheet.getCellByPosition(firstCol,firstRow)

    # get the type of the cell
    cellType = selectedCell.Type.value

    # print in console
    print("Cell (",firstCol,",",firstRow,") Type:", cellType)

    # display in next cell
    active_sheet.getCellByPosition(firstCol+1,firstRow).String = "Cell Type:" + cellType
Full script with both functions:
# Created by Gwenole Capp 18/06/2020
# For tutolibro.tech
# Public Domain, feel free to copy, modify, use in your own scripts
#
# email: [email protected]

def context():

    # set global variables for context

    global desktop
    global model
    global active_sheet

    # get the doc from the scripting context
    # which is made available to all scripts
    desktop = XSCRIPTCONTEXT.getDesktop()
    model = desktop.getCurrentComponent()

    # access the active sheet
    active_sheet = model.CurrentController.ActiveSheet

def main():

    # call function context()
    context()

    # get the range of addresses from selection
    oSelection = model.getCurrentSelection()
    oArea = oSelection.getRangeAddress()

    # get the first cell
    firstRow = oArea.StartRow
    firstCol = oArea.StartColumn
    selectedCell = active_sheet.getCellByPosition(firstCol,firstRow)

    # get the type of the cell
    cellType = selectedCell.Type.value

    # print in console
    print("Cell (",firstCol,",",firstRow,") Type:", cellType)

    # display in next cell
    active_sheet.getCellByPosition(firstCol+1,firstRow).String = "Cell Type:" + cellType
On gitHub:
Download or clone from this folder on my gitHub repository.
If you are not familiar with git and gitHub you check this post I wrote as Annex to these series of tutorials.
Leave a comment
Please leave a comment to tell me what you think of this tutorial or if you have any question.
If you like this tutorial you could buy me a coffee to help me continue writing add-free tutorials.
Thank you!


Congratulations!!
Excellent tutorial! I have been working with Microsoft Office macros (VBA) for a long time and the most difficult thing to switch to Libre Office python macros (same to Libre Office Basic) is to be able to understand your object model. In VBA all starts with the namespace Application.
If in the future you can approach the Libre Office object model, it would be fantastic. But we know that this is already an intermediate level.
Hi Marcelo, and thank you very much for your comments. I am taking on board your suggestion, I am actually planning to do a tutorial on working directly with Uno objects indeed. Thanks